How do I set up my workspace the first time?
Your first sign-in opens a short setup. Pick your roles, pick the code bundles you need and a billing term, then confirm and continue to checkout.
3 videos · 24 sec in all
Video 1 of 3 · 9 sec
Choose your roles
Captions are in the video. The steps and the full narration are below.
Step by step
Before you start. Your first sign-in to a new workspace opens a short setup, starting at Select your roles.
- Under What best describes your role?, click every role card that fits you, such as CFO / Pricing Analyst.
- A picked card shows a check mark and may show a sample question under QUESTIONS YOU'LL ASK. Click a picked card again to clear it.
- Click Continue with 1 role →. The count follows your picks, and you can change roles later in Profile & preferences.
What you see. Setup moves on to Which codes do you work with?, where you choose code bundles.
Tip. The first role you pick leads, and its sample question becomes the first question to try at the end of setup.
Read the narration
Click every role that fits, like CFO / Pricing Analyst, then Continue with 1 role to pick codes.
Screens from this video
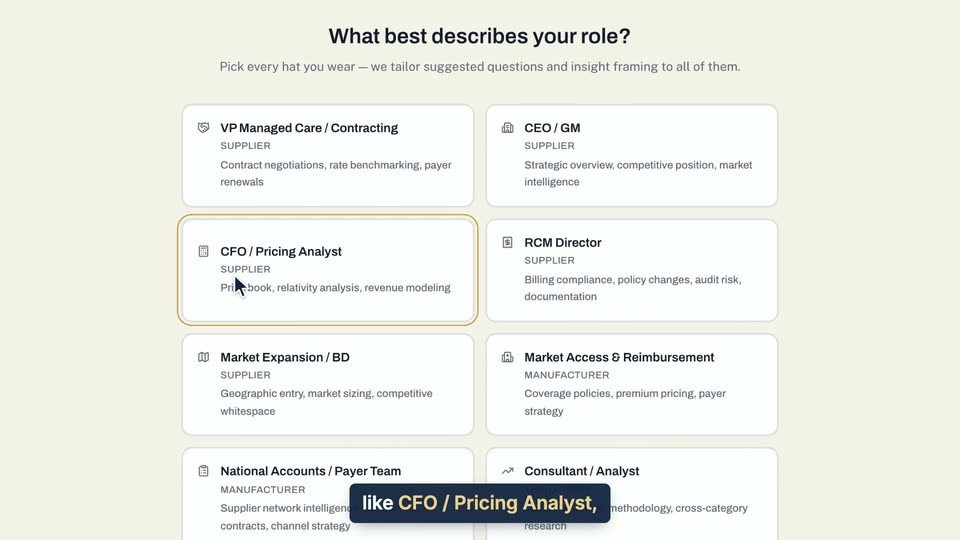
01 Click every role that fits, like CFO / Pricing Analyst, then Continue with 1 role to pick codes. 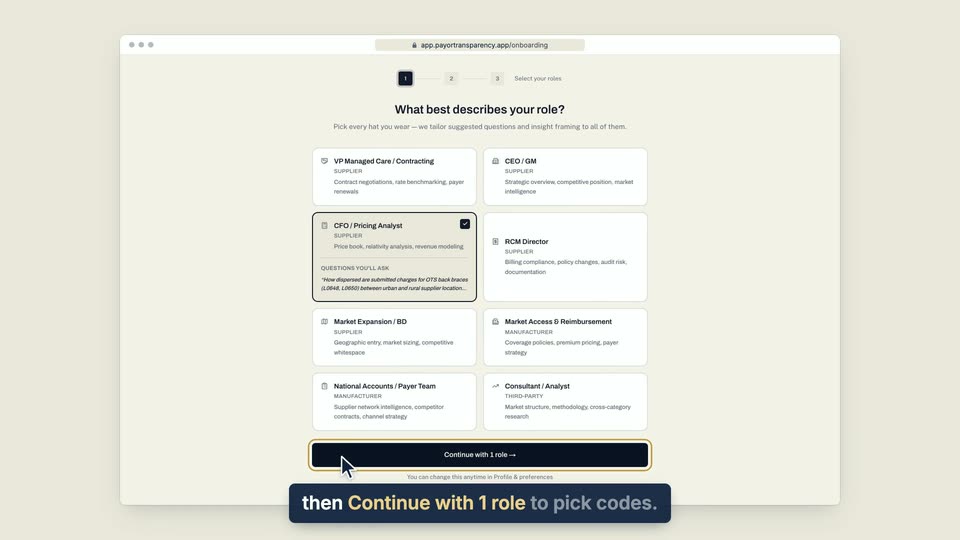
02 Click every role that fits, like CFO / Pricing Analyst, then Continue with 1 role to pick codes.
- Use case
- How do I set up my workspace the first time?
- Task
- Choose your roles
Video 2 of 3 · 8 sec
Pick code bundles and a billing term
Captions are in the video. The steps and the full narration are below.
Step by step
Before you start. This is step 2 of the setup that opens on your first sign-in, right after you pick your roles.
- Under Which codes do you work with?, choose Month to month or Annual. That term covers the base platform and every bundle on your plan.
- Click each bundle you need, such as Urological. Its codes appear under YOUR CODES.
- Click the button that starts with Continue with and shows your code count.
What you see. Each bundle you picked shows a check mark, and the last step, Confirm & start, opens.
Tip. Need every code? Click Book a demo in the All access row.
Read the narration
Choose Month to month or Annual, click each bundle you need, like Urological, then click Continue.
Screens from this video
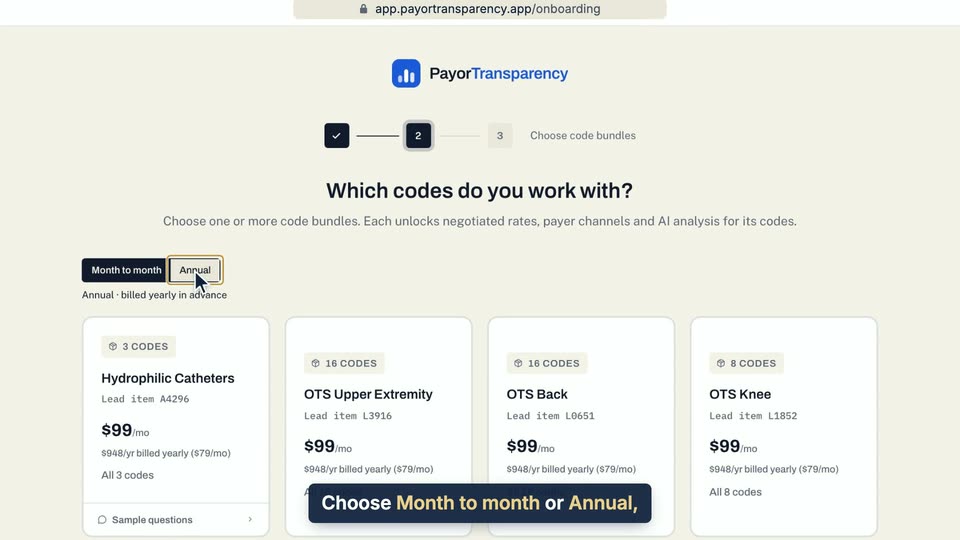
01 Choose Month to month or Annual, click each bundle you need, like Urological, then click Continue. 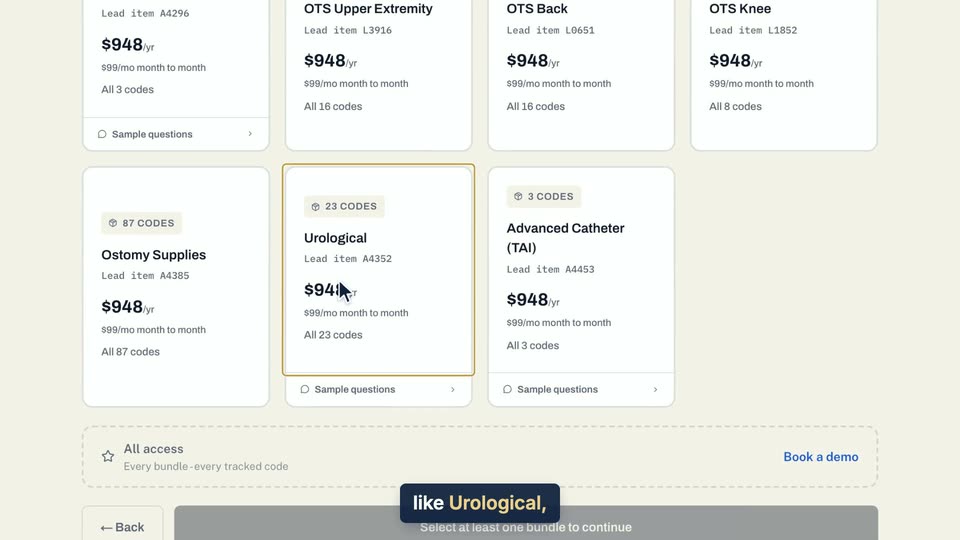
02 Choose Month to month or Annual, click each bundle you need, like Urological, then click Continue. 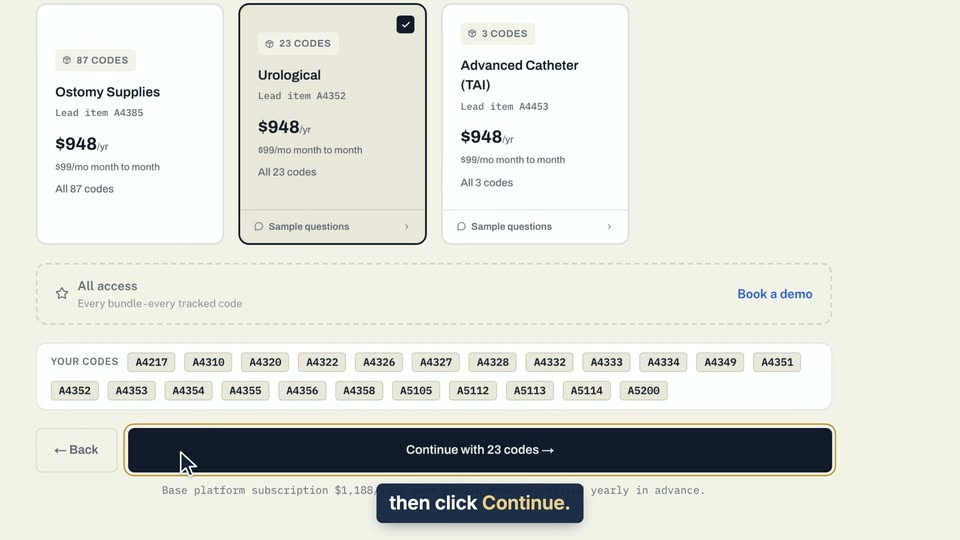
03 Choose Month to month or Annual, click each bundle you need, like Urological, then click Continue.
- Use case
- How do I set up my workspace the first time?
- Task
- Pick code bundles and a billing term
Video 3 of 3 · 8 sec
Finish setup and check out
Captions are in the video. The steps and the full narration are below.
Step by step
Before you start. The last setup step, Confirm & start, opens after you pick your roles and code bundles.
- Check the ROLES card for the roles you picked and the CODES card for every code in your bundles. To change a pick, click ← Back.
- Click Continue to checkout →. Stripe Checkout opens for the base platform and your bundles.
- The subscription is sold through Link, so your card statement shows LINK.COM*.
What you see. After you pay, you land on Profile & preferences with your bundles active. If you leave Checkout, your roles are kept and you land on its Code bundles tab, where you can add a bundle later.
Tip. Your first checkout always includes the base platform subscription and at least one bundle.
Read the narration
On the last setup step, check your ROLES and CODES. Click Continue to checkout, and Stripe Checkout opens.
Screens from this video
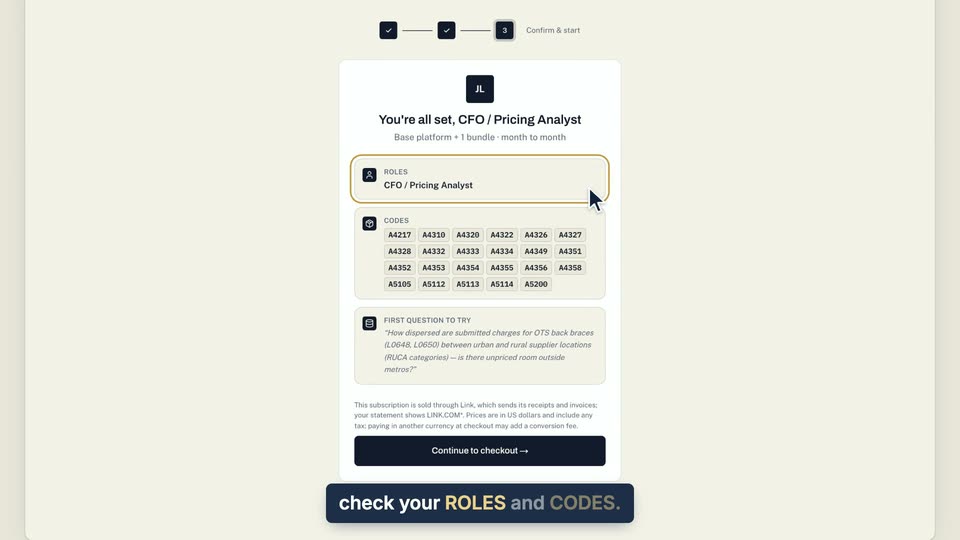
01 On the last setup step, check your ROLES and CODES. 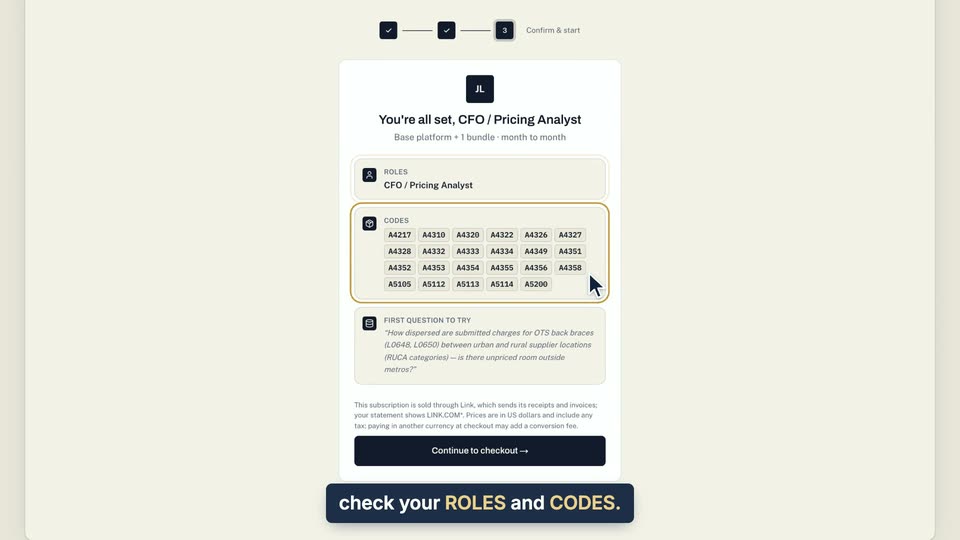
02 On the last setup step, check your ROLES and CODES. 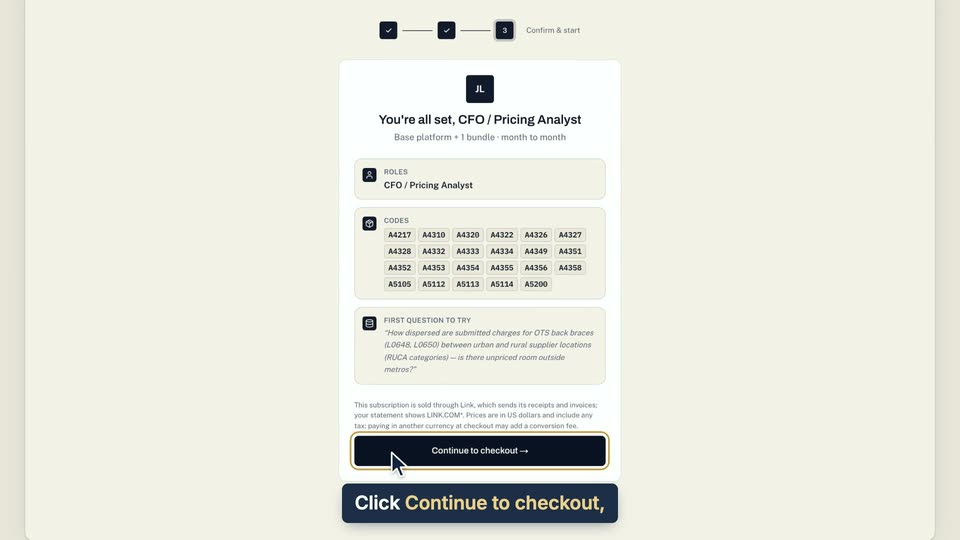
03 Click Continue to checkout, and Stripe Checkout opens.
- Use case
- How do I set up my workspace the first time?
- Task
- Finish setup and check out